What is Risograph?
Risograph (Riso in short) is a high-speed printer invented by RISO Kagaku Corporation in 1986, which combines the process of screen printing and photocopying, printing one or two colours at a time with translucent, rice-bran oil inks. Originally, Risograph was designed for medium-to-high volume photocopying and printing for schools and churches, in recent years it has become increasingly popular with creatives because of its affordable budget and playful vibrant results.
How does it work?
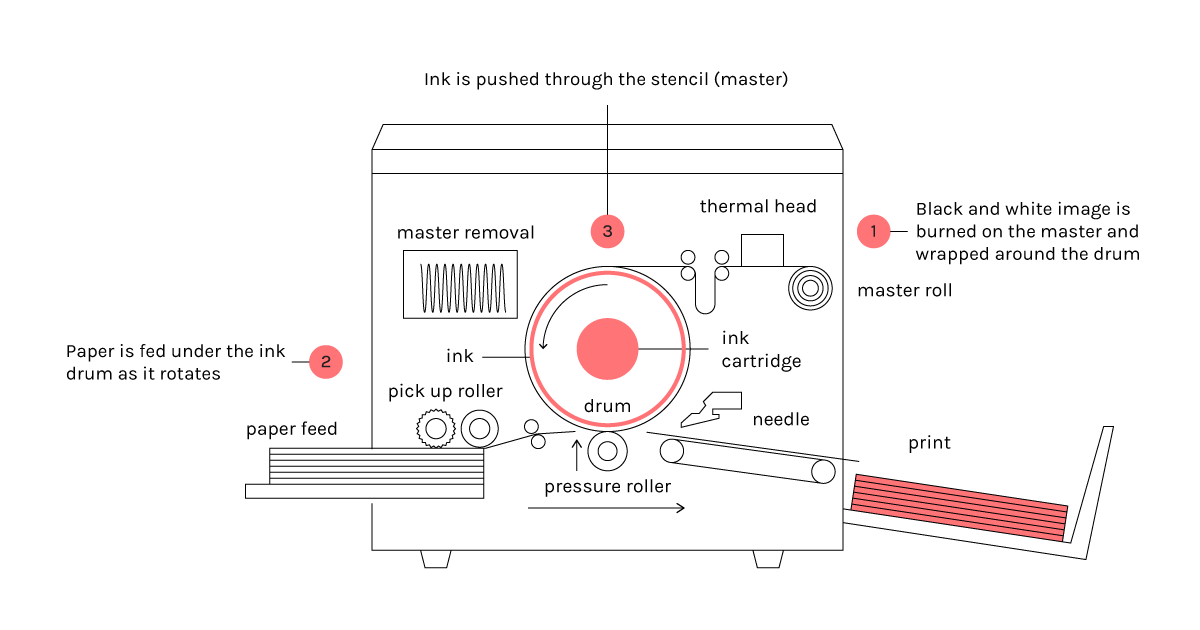
After your black and white/grayscale file is sent to the machine via computer or scanner, the machine will create a (stencil) master and wraps it around the ink drum. The paper is fed through the machine under the ink drum that spins at high speed, forcing the ink through the master onto the paper to create an impression.
Riso quirks
SMUDGING
Similar to the newspaper, Risograph ink will never fully dry.
REGISTRATION
The colours are unlikely to align perfectly as each colour is layered separately.
COVERAGE
Large areas of solid ink coverage are likely to appear slightly uneven. We suggest setting in 75% - 85%.
ROLLER MARKS
The paper feed rollers may pick up ink from one print and leave roller marks on the next print.
Printable area & paper
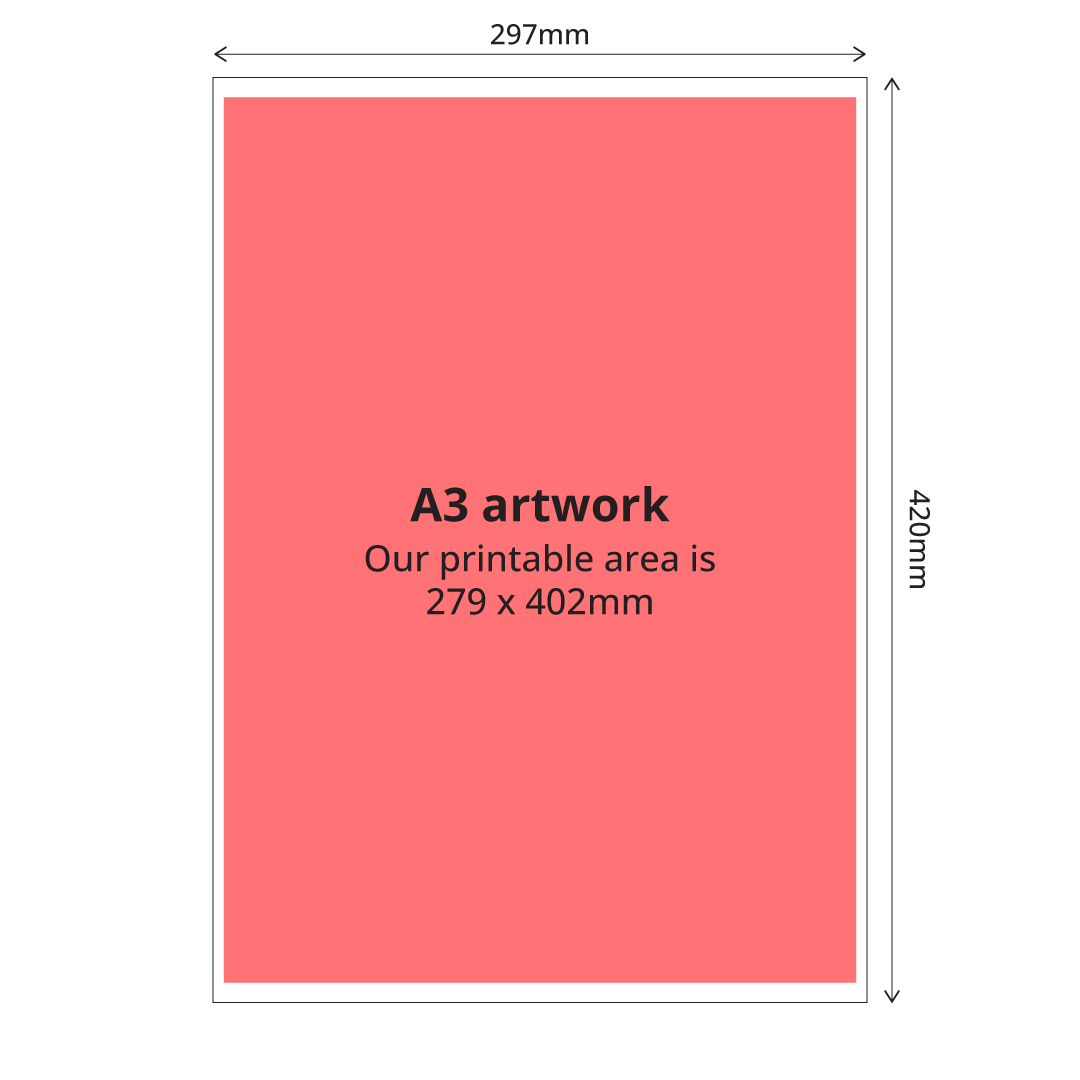
- Max. paper size: 297 x 420mm (A3)
- Max. printable area: 279 x 402mm, including crop marks and bleed,
- Riso cannot print full bleed. Any full bleed trimmed prints will be smaller than A3.
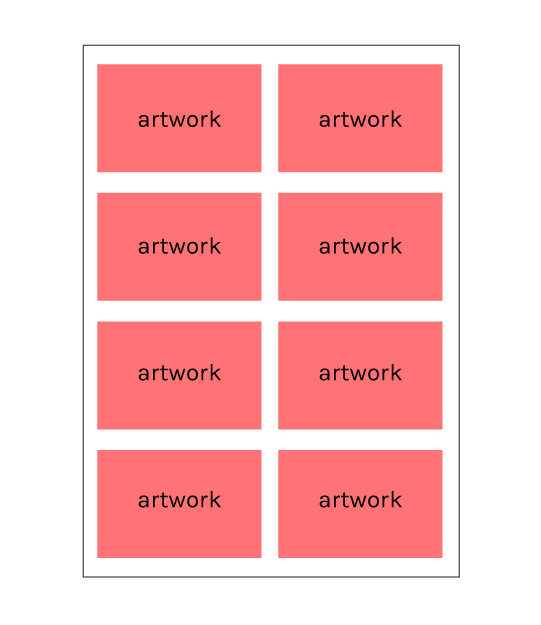
- If your artwork is small, we suggest you put multiple copies on one sheet to reduce printing costs.
- Riso prints on uncoated paper, with 80gsm - 300gsm
- Smooth finish paper achieves a more solid looking colour. Opt for thicker paper when printing with lots of ink.
Overprinting & knockout
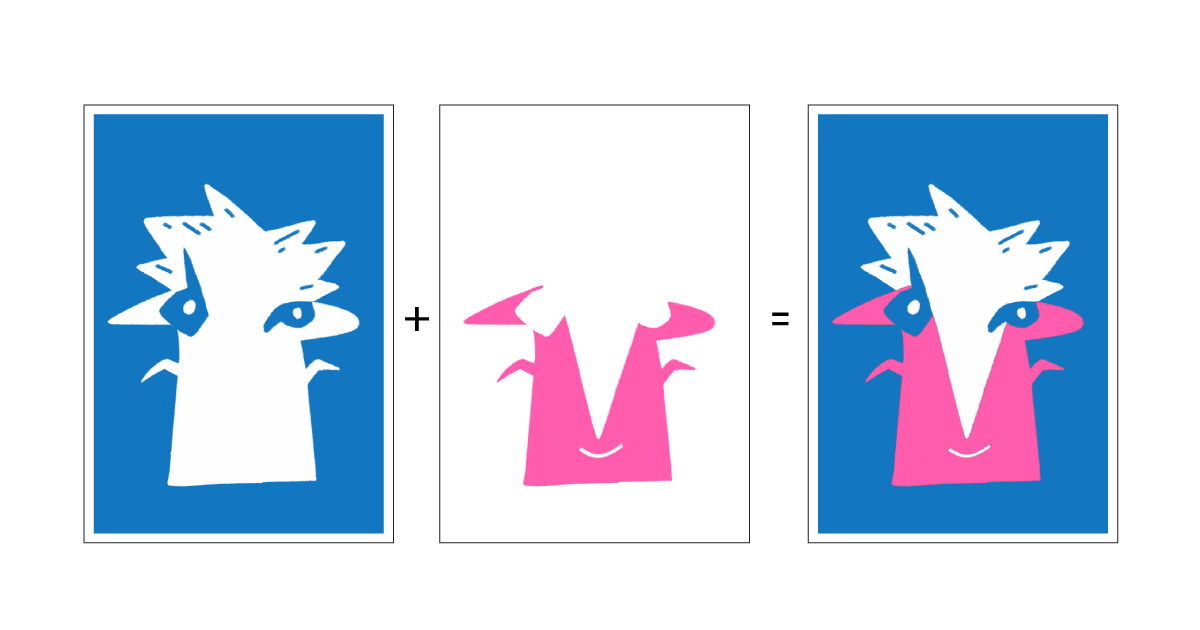
OVERPRINTING: When two or more colours overlap to create a new colour
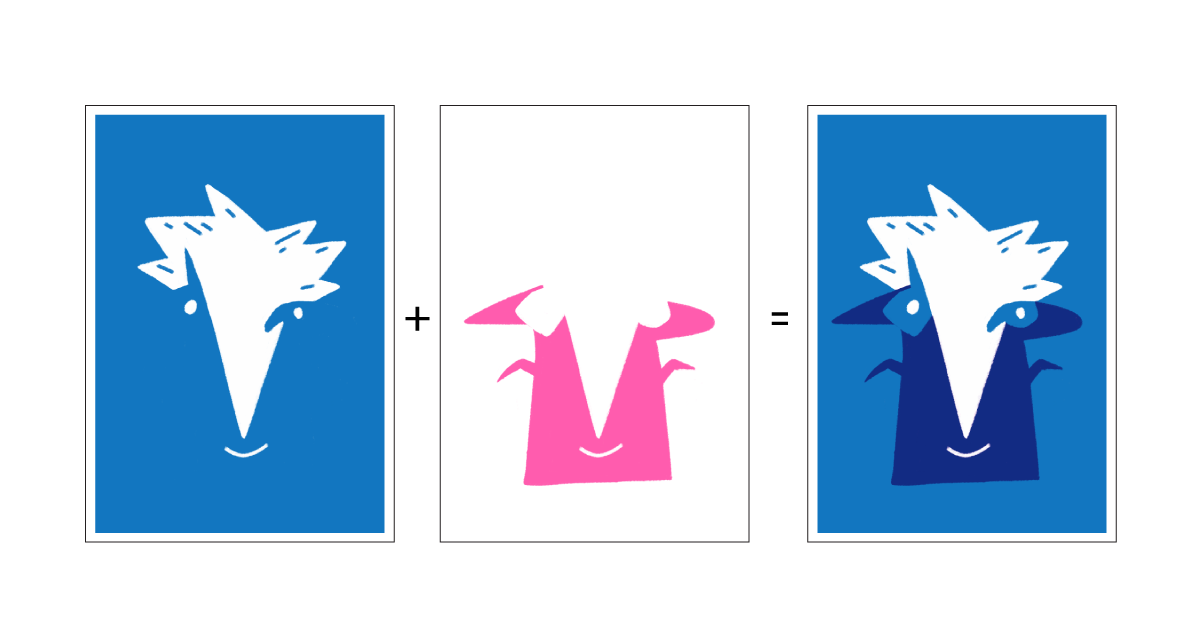
KNOCKOUT: Areas that are intentionally “cut out” so they don’t overlap each other
Text & stroke weight
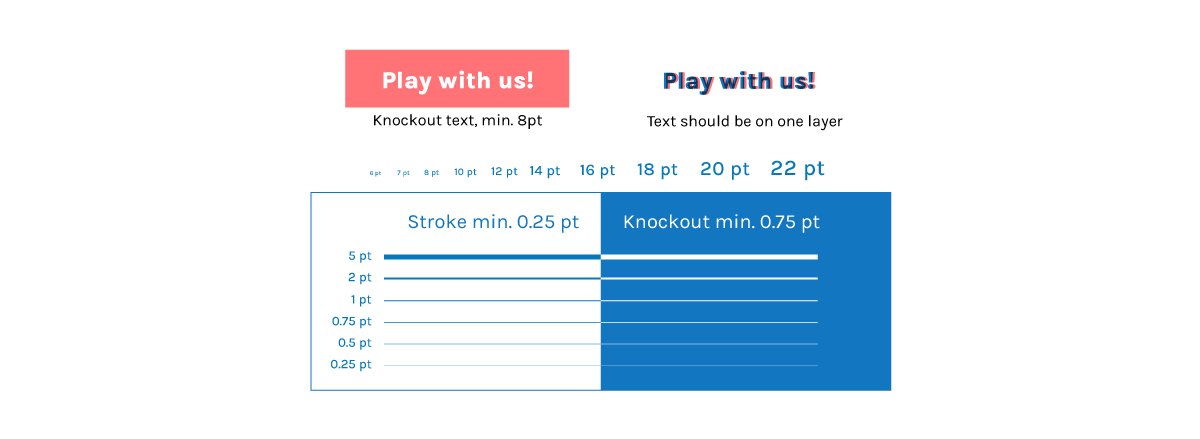
- Minimum size: 6pt, 8pt for knockout
- All text should be in vector and outlined
- Best read in one colour
- Do not set type in Photoshop to avoid your text being rasterized
- Set type size below 12pt in registration black and for type over 12pt use a 100% black
File preparation basic checklist
- Grayscale as separate PDFs (no compression)
- A3 size, 300dpi-600dpi
- Within printable area
- Name your files clearly
- Include a final visual proof PDF/jpeg
- Flattened (no layers, effect and transparencies)
File naming
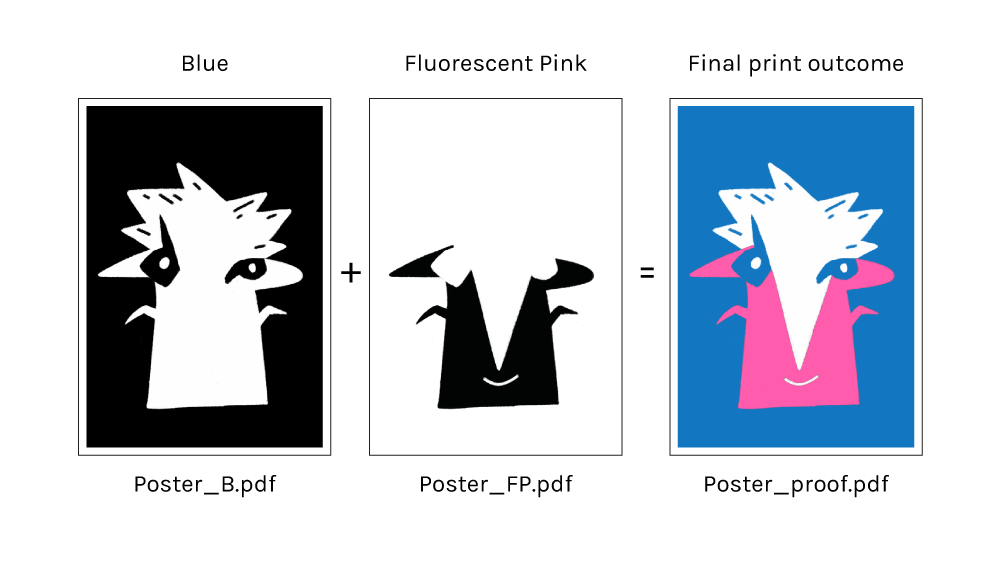
- One colour = one master = one file
- Title your files clearly
Single sided:
YourName_Filetitle_colour.pdf
1. CC_Poster_B.pdf
2. CC_Poster_FP.pdf
Double sided:
Name_Filetitle_#sheetside_colour.pdf
1. CC_Flyer_1A_B.pdf
2. CC_Flyer_1A_FP.pdf
3. CC_Flyer_1B_B.pdf
4. CC_Flyer_1B_FP.pdf
# = the sheet of paper, A/B = front or back)
B = blue, FP = Fluorescent Pink,
G = Green, FO = Fluorescent Orange
K = Black
Zine / booklet file setup
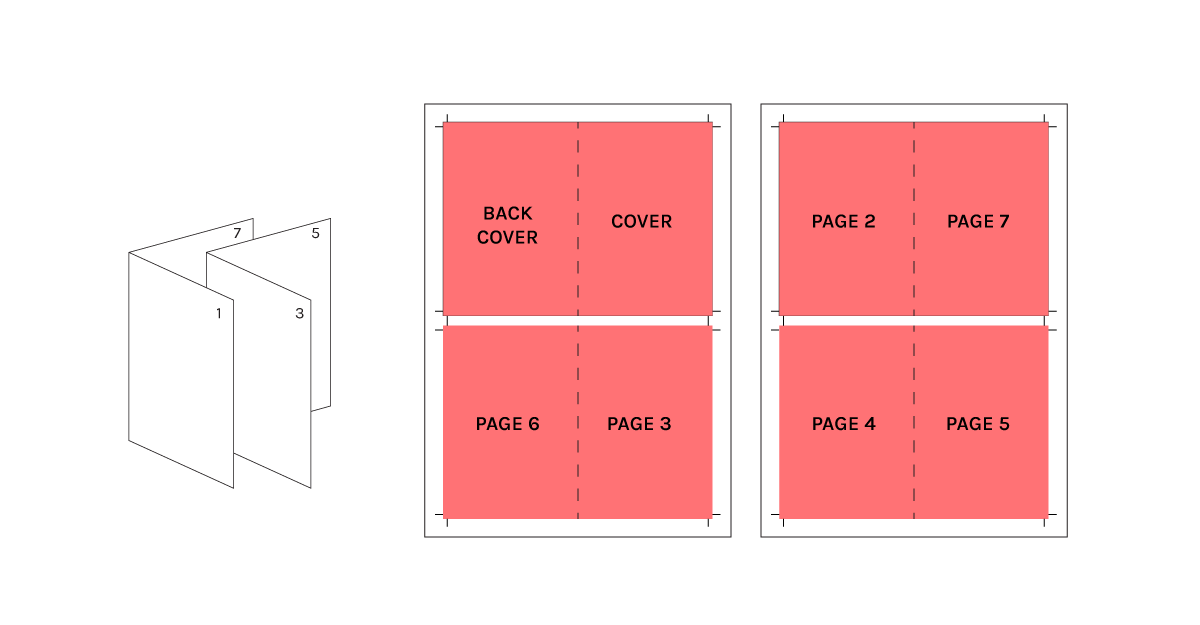
- Paginated before print
- Make a physical mockup to make sure all your pages are in the right place
- Recommended smaller than standard A4 & A5 for trimming
Our riso colours
Fluorescent Orange, Fluorescent Pink, Green, Blue, Black and Yellow.
You can download our riso swatches here.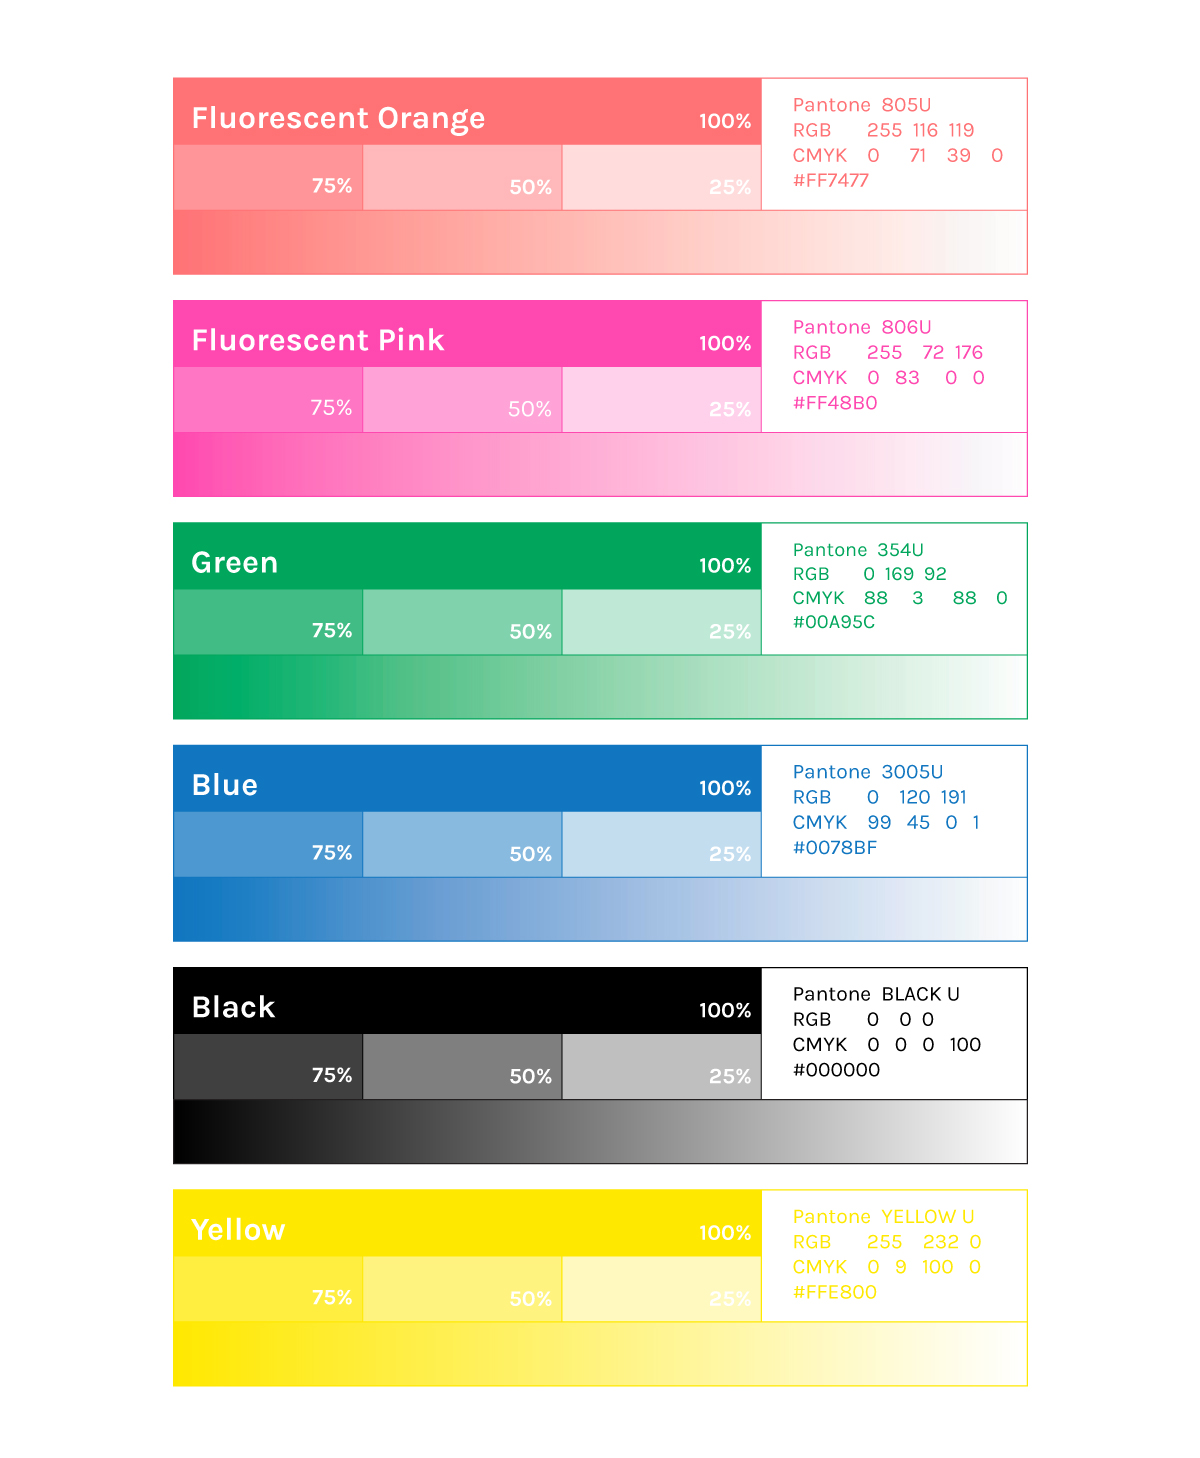
Riso quote
If you are interested to print risograph, please fill up this form for riso quote.
